How To Pitch A Bell Tent: Your Ultimate Guide
Bell tents have continued to be a popular choice for glamping, festivals, retreats and garden adventures. Their classic design, spacious interiors, and easy setup make them perfect for campers who want comfort and style. In this guide, we'll walk you through the correct way to set up a bell tent to ensure you’re the envy of the campsite!
Step 1: Choose the Right Spot
Where you pitch your bell tent can really affect not only your tent but a comfortable nights sleep.
For the perfect pitch, look for:
• Flat, dry ground to prevent water pooling
• An area free from sharp rocks or roots
• An area free from trees to avoid sap and bird poo staining your canvas
Step 2: Unpack and Lay Out the Tent
Get the tent, pegs and poles out of the bag. At The Bell Tent Shop our bags are made larger than a standard size so you’ve got plenty of room to store these all together.
Unroll your bell tent and lay it flat on the ground in the desired spot. Ensure the entrance is facing the way you’d like before moving to the next step.
Step 3: Peg Down the Groundsheet
Secure the groundsheet by pegging it down through the elastic loops and metal rings around the base. Start with four opposite points to keep it taut, then work your way around the perimeter. A tight groundsheet helps keep the tent stable and prevents water from seeping in.

Step 4: Insert the Central Pole
Put the centre pole together (ours are spring loaded for easy assembly) and go through the door, pushing the centre pole into the hood in the centre of the tent. Push the pole until it is vertical and ensure it is firmly placed on the ground in the centre of the groundsheet. This step gives the bell tent its iconic shape.

Step 5: Position the A-Frame Door Pole
Build the A-frame and position it inside the door. You will see a spike at the top of the frame which needs to be inserted through the hole at the top of the door. Push the bases of the A-frames into the sockets (picture below) inside the tent and ensure it is upright. Secure it in place with the rain cap on the outside.

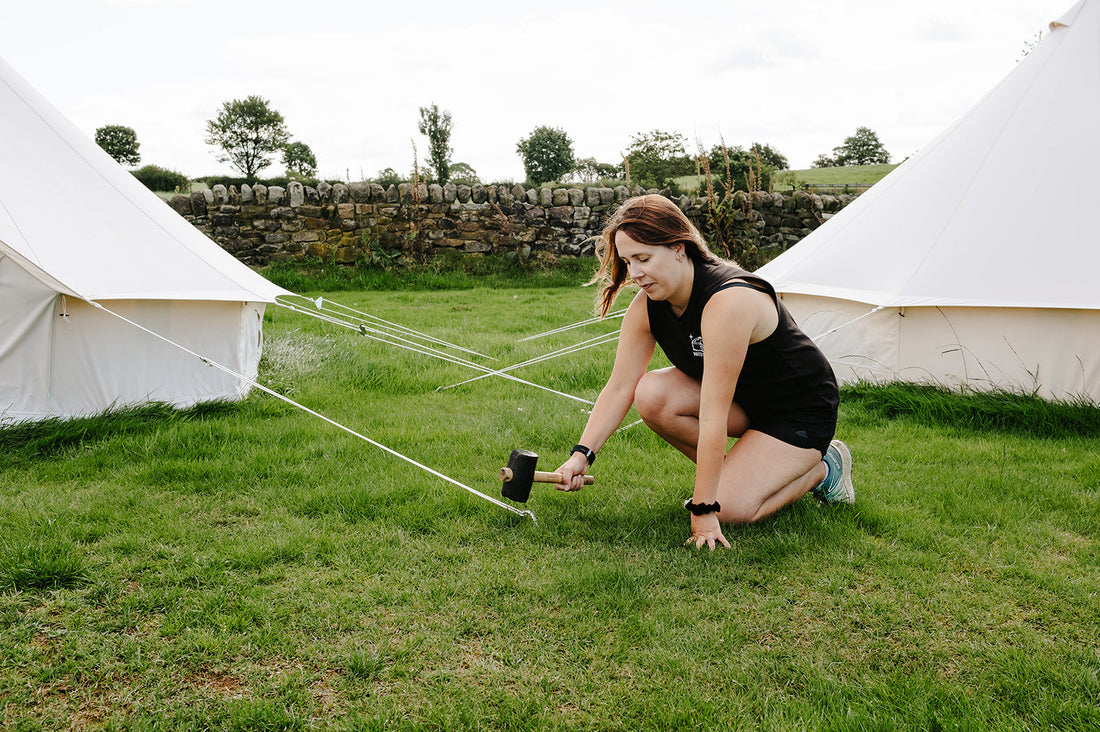
Step 6: Secure the Guy Ropes
Pull the guy ropes taught and peg them into the ground at a 45-degree angle. Like the groundsheet, start with four opposite points to keep it taut, then work your way around the perimeter.
Ensure they are evenly spaced and taut to provide structural integrity and withstand wind.

Step 7: Adjust Your Guy Ropes
Once all pegs and ropes are in place, walk around the tent to check for any slack. Adjust the guy ropes as necessary to create a smooth and even structure. You want the guy ropes to be taute but not overly tight. The bell tent should be stood upright and being pulled evenly on all the guy ropes.
Bonus Tips for the Best Bell Tent Experience
Weatherproof Your Tent: If your tent is brand new, season it by pitching it, wetting it with a hose pipe and allowing it to dry completely. This tightens the canvas seams and enhances waterproofing.
Use a Footprint: A footprint underneath your bell tent adds insulation and protection. Take a look at the range we have available.
Keep Ventilation in Mind: Open vents and windows to prevent condensation inside the tent.
Store Properly: When packing up, make sure your tent is completely dry to avoid mould and mildew.
Whether you're glamping in the countryside or setting up for a festival, following these steps will keep your tent sturdy, comfortable, and ready for adventure.
Looking for the Perfect Bell Tent?
At The Bell Tent Shop we offer a range of high-quality bell tents in the UK, designed for durability and style with 300gsm 100% cotton cream canvas, heavy-duty groundsheets and reinforced seams. Explore our range today and embrace adventure!

